Categories
FAQ

I need a Rainwater Tank but where do I start?

Okay, so you need a rainwater tank!

Maybe it’s because you are building a new home or putting on an addition and you have a “BASIX“ requirement to put a certain size tank in, or maybe you just want to harvest water to take care of your garden.
I need a Rainwater Tank but where do I start

Most people just don’t know where to begin with their research on what size water storage tank to have, what type of water pump they require and how much roof space they need to harvest.

Lets look at the steps one can take on designing a suitable water storage system.

Find possible suitable locations for the tank.

The best way to begin the process is to first walk around your property and find some locations that you feel may be suitable for a tank. When you are doing this always try to be mindful of where the downpipes are, or going to be, if you are having a new home built. Obviously the closer the inlet of the tank is to a downpipe, or downpipes, the easier the installation will be.

Measure dimensions of the space available for the Water Tank.

Once you find some locations that you feel may be suitable, the next step is to write down the dimensions of the space you have available.

You need to measure the maximum length the tank could be, the maximum depth and the maximum height possible. Most people these days have limited space so tend to go for Slimline tanks.

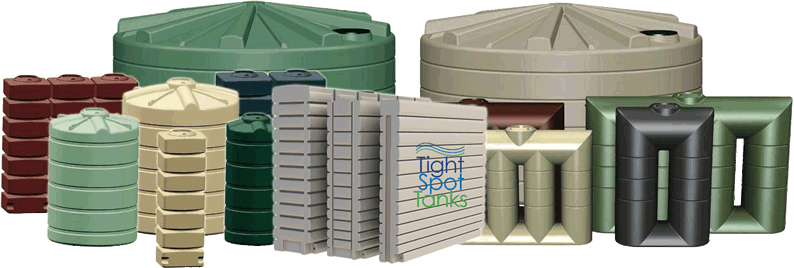
These may be located along the side entrance of the home or possibly somewhere at the back of the property. There are tall slimline tanks, low-line slimline tanks ( for going under windows), and very thin tanks which are available.

Keep in mind polyethylene ( plastic ) tanks come out of moulds, so they are fixed sizes as these moulds to make one tank are very expensive.

When a poly tank cannot be sourced to fit your space this is when a custom made Steel Tank is going to be suitable. Steel tanks are made on rolling machines and they can be made to fit almost any dimensions that you require.

So the second step after finding a suitable tank location is to write down the maximum dimensions of the space you have available. This is the most important information that you can give us when calling for tank options, as it allows us to match suitable tanks, which we can then quote on.

What is the Tank to be used for?

The next question we will have for you is; What is your tank to be connected too?

Is it to feed just one or two garden taps for use in the garden?

If so, do you intend at a later stage to maybe connect it to the house, ie – toilets & washing machines? If this is the case you should advise us, so when we suggest a pump system we can suggest a pump that can have a mains backup device added at a later stage. This will obviously save you money in replacing the pump when you do the upgrade.

Is your tank to supply the home, ie – Connection to toilets & washing machines or possibly be the main water supply for the entire home?

If connecting to fixtures in the home you will require a mains backup device, whether it be a manual or automatic system. Obviously when connecting to the home you require mains backup as if the tank is empty you will require mains water for the fixtures in the home.

You can view further information on our FAQ section entitled “ Mains Backup Systems”.

What type of Pump do I require?

Answering the above question usually leads to the type of pump you will require.

Another question which may be asked and very important when choosing a pump, is where is your tank to be located? Is it on an external wall with a bedroom behind it, or possibly the living area? Obviously noise needs to be considered if this is the case and we may suggest a submersible pump as opposed to an external system.

Garden Only Systems – If your water tank is to supply rainwater for garden use only then we may ask the following questions:

How many garden taps are there to come off the tank?

Is your land flat or does the pump need to pump uphill?

Will you be connecting the water tank pump to an irrigation system , now or in the future?

This question is very important, as if the pump is to be connected to an irrigation system then you will need to advise the flow rate required for the irrigation system to work correctly, and the pump will need to be matched to this.

Connection to the Home – If the tank is to be connected to the fixtures in the home then we need to find a pump with a mains backup device and one that has enough pressure to reach your fixtures, so please advise if the home is single, two or three story.

The answers to these questions will assist us in advising a suitable pump system for your purposes and also help us advise you in what filters you may require.

The more information that you supply to us based on the information listed above, the easier it will be in getting a quotation for the correct rainwater tank and components that you will need for a quality installation.

Always feel free to call us on 1300 885 547 for any clarifications about the information on this page or you can send us an email here Contact TightSpottanks. If you like you can even add your comments below and i will be more than happy to answer them for you.

water tank installation call us

Categories
FAQ thintanks

“ThinPot” Vertical Garden

[vc_row][vc_column][vc_column_text]Our design team has been working on a very exciting option for our ThinTank range of rainwater tanks.

Create A Vertical Garden On Your Existing Water Tank

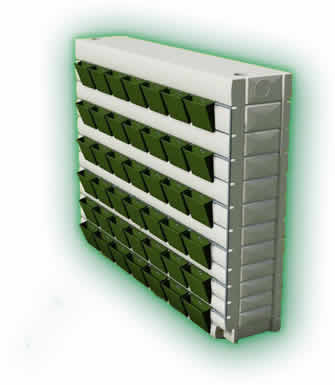
ThinPot Vertical GardenCurrently nearing design completion is the “ThinPot Vertical Garden“ which will allow existing and new customers to create Vertical Gardens on their 1000 & 2000 litre ThinTanks.

Each of the ThinPots will be fed by a drip irrigation system, which will be built into the current vertical spaces on the tanks.

These ThinPots can be used to grow vegetables, or for colourful flowers which can be used as a cover for the water tank.

We are also in the final stages of matching the system with a solar powered pump which will be used to pump the rainwater through the fitted irrigation system to the ThinPods.

This pump system may also have a timer system installed which will allow watering times to be set for the Pods.

The ThinPots will make your ThinTank more than just a water tank.

Using the Vertical Garden option, you can turn your ThinTank into a creative work of art, or a constant food supply for your family.

To be placed on our notification list about this new and exciting product release please use the form below, once the details and pricing have been confirmed we will post you a special information pack on the ThinPot System.[/vc_column_text][/vc_column][/vc_row]

Categories
FAQ

How To Make A Base For A Rainwater Storage Tank

One of the most important components of your rainwater storage tank installation is the base. I tell this to every customer that has a Site Assessment with me, and people are often surprised by the comment.

Why is the base of the water tank so important?

Well lets say you are installing a 3000 litre slimline water tank against your building in the side passage. The first thing you need to understand is that the tank will weigh over 3 tonne when it is completely full. That’s a lot of weight to hold, so the water tank base must be able to support the tanks weight.

The last thing you want once you have installed your tank, is to then be waiting for the first rainfall, and then once the tank fills the base gives way and the tank begins to lean on the house. Have 3 tonne leaning against your building is not a desirable situation to have.

Over the past 6 years I have visited several sites where this has actually happened. I remember a call out by an elderly lady who had called in a panic explaining that her tank was leaning against her house. On arrival to her home I found a 5000 litre round tank leaning against her weatherboard wall. Several of the panels had been broken and it was only a matter of time before the sheer weight of the tank would have collapsed the wall completely.

Fortunately the tank was only have half full making it only around 2.5 tonne of weight.

The base was only constructed using some river sand which had been thrown slap shot under the tank. There had been no timber frame to hold the sand in place, and over time with rain etc the sand had been slowly washed away and eventually the tank base was undermined and started to lean.

So to avoid this situation the best thing to do is to ensure your tank base is constructed with the right materials and suitable for the location and the tank you are installing. If you are unsure as to what is required you can give me a call on 1300 885 547 and I will gladly assist.

There is generally two types of base’s that we install, a frame using a timber base filled with sand and/or crusher dust, and a concrete reinforced slab.

1.  The Timber Frame Base

This base is generally useful when the site is very flat and in on a grassed/soil area. You cannot use this base when there is already a concrete slab.

The first thing to do is to ensure the area has been leveled out and is on firm ground. If the area consists of fill, then you need to make sure it has been very firmly compacted.

The next step is to make a rectangular or square frame depending on the type of rainwater tank, ie – slimline tank or round tank. You want the timbers to be treated and have a width of around 150mm. This will allow you to fill the frame to a height of around 120mm with the sand, blue metal or crusher dust.

Always ensure to make the timber frame at least 100mm longer at either end of the tank and at least 50mm wider than the tank. This allows rooms for the weight of the tank when full to be dispersed over the base. You do not want the edges of the tank to be nearly touching the timer frame.

We prefer to use crusher dust or quite course sand, although you may also use very fine blue metal. The blue metal can be used when the site does have water running past our through it, as the larger fill of blue metal will be more resistant to been washed away and the base been undermined. Always check with the manufacturer of the rainwater tank been installed as to the type of base that should be used and which will not breach the warranty.

Once the frame is made, the fill is then poured in and distributed evenly within the timber frame. Once again ensure that it is compacted well before moving the tank on to the base.

Once the fill is well distributed in the frame and is even and compacted, the tank can be put into place. As this is been done sometimes the fill will move around as well. The best thing to do is to get the tank into the centre of your base and have one person at either end moving it too and thro until it finds its level on the base.

2.  The Concrete Base

The concrete base is generally the best type of base to install for your rainwater tank system. The base is must be used when the tank is to be placed on an area with existing concrete. If the existing concrete path or base that is on site is not totally flat and void of large holes/cracks then a new base must be placed on top.

For the concrete base up using your timbers and again remember to allow an additional 100mm either end of the slab and at least 60mm in width. You do not want to have the tank sitting right on the edge of the slab, as over time the slab will begin to crumble away on the edges. You need the extra length and width on the base to disperse the weight of the tank. Remember a 3000 Litre tank weighs over 3 tonne, and this is why the slab construction and size is so important.

Once the slab has been formed up, then put some F62 steel mesh through the mix to reinforce the slab. The concrete must be at least 25mpa and I suggest making the slab a minimum of 100-120mm thick.

The slab should have a troweled finish and should be screed flat and be level with no high or low spots.The base of the tank needs to be supported across the entire surface.

2000 litre thintank

Categories
FAQ

Water Tanks FAQ

[vc_row][vc_column][vc_column_text]This section our site is for those that want to ask questions that are not related to any of our current rainwater tanks.

This is where any questions that don’t fit will be placed and answered in relation to any of our rainwater tanks and additional water saving accessories that you may need when purchasing a rainwater storage tank.[/vc_column_text][/vc_column][/vc_row][vc_row margin_top=”10″ margin_bottom=”0″ padding_left=”40″ padding_right=”40″ bg_position=”top” bg_repeat=”no-repeat” bg_cover=”false” bg_attachment=”false” padding_top=”40″ padding_bottom=”40″ parallax_speed=”0.1″][vc_column width=”1/1″][vc_column_text]

Question:  What Is A First Flush Diverter? Do I Need To Install One?

Answer – A first flush filter is usually fitted to every down pipe that is to feed water to the rainwater tank. The diverter prevents the initial 10-25 litres of water collected from the roof, from entering the inlet of the rainwater tank. Please follow this link to get a complete explanation and video on What Is A First Flush Diverter.

Question: What Size Water Storage Tank Should I Buy?

Answer: This is one of the more often asked questions that I am asked. There is quite a few factors that determine my answer to this.

Is the storage tank to feed water to the home for toilets, washing machines?

How many garden taps are to be connected?

Will the garden taps be feeding an irrigation system?

Will the rainwater harvested be used to keep a swimming pool topped up?

Obviously these questions need to be answered to gauge an idea of the amount of water that will be required to achieve the goals of the customer. We have created a separate page that goes into much more details about what size water tank you need, follow this link to read more.

Question: Do I Need A Water Pump? Or Will Gravity Work?

Answer: This is a question that I get almost on a daily basis and when asked my first question to the customer is always the same:

Is the tank to be connected to the house and service toilets and/or the washing machine?

If the answer is yes, then my response is also yes, a pump will be required for the rainwater tank. The reason being is that when you connect to fixtures in the house, you need a mains backup system. This may be either a manual or automatic system but pressure will be required to operate both types of systems.

Mains backup is obviously required for an installation of this type, as if the water tank is empty, mains water will be required to be diverted to the fixtures, ie – cistern in the toilet.

Now, if the tank is only to be used for filling a pool, or for the garden, gravity may suffice. In saying this the tank to have any real pressure would need to be a minimum of around 3-5m above where the  water is needed.

So if a garden is going to be watered with a hose coming from the tank which is 5m above the tap in the garden the Head of Water may be enough to give adequate pressure. This is rare on most sites and generally I advise customers if they want any pressure at all from the garden tap then a small water pump will be required.

Power usage will be minimal as the pump will only come on when the tap is opened and been used.

In over 90% of cases where people have attempted to use gravity, they tend to call back within 3 months of installation and purchase a pump system. Follow this link to see all of our available pump packages.

Question: What Is A Charged Line?

Answer: Many customers after discussing rainwater tank installations with their builders or plumbers often hear the term “ charged line “ , but are confused what this actually is and how it works.

A charged line is installed when a down-pipe is some distance from the tank it wishes to feed.

For instance their may be a down-pipe coming from the gutter on the opposite side of the house from where the tank is installed. If there is adequate access under the house the plumber doing the tank installation may use a charged line. This would mean fitting a PVC round down-pipe, say 90mm, to the nozzle on the gutter and run it down and then under the house to the tank location, where it would then rise up and into the tank inlet.

As the pipe is PVC and sealed, and as long as the inlet of the tank is at least 750mm lower than the nozzle coming off the gutter, the water will actually fill in the PVC pipe and as water finds its own level will begin to come out the lowest opening which is the opening that is installed over the inlet of the tank.

Of course the pipe will essentially always be charged and hold a certain amount of water. It is only when it is been filled during periods of rain will it then push the water to the lower opening over the tank.

Charged Lines are a very effective way of harvesting large amounts of your roof area, and the more roof are that is harvested, the quicker the tank will be refilled.

We will be constantly updating our water tanks FAQ page with more questions and answers, you are more than welcome to submit your own questions using the form below.

Question: What Do I Need To Construct A Water Tank Base?

Answer: There are few ways that you can install a rainwater tank, so to give you the complete insight into what is right for you we have written a separate page that out lines How To Make A Base For A Rainwater Storage Tank.[/vc_column_text][/vc_column][/vc_row]

Categories
FAQ

What Size Water Tank Should I Buy?

[dt_gap height=”30″ /]This is one of the more frequently asked questions on our FAQ Page.

What Size Water Tank Should I Buy

There is quite a few factors that determine my answer to this.

Is the tank to feed water to the home for toilets, washing machines?
How many garden taps are to be connected?
Will the garden taps be feeding an irrigation system?
Will the rainwater harvested be used to keep a swimming pool topped up?

Obviously these questions need to be answered to gauge an idea of the amount of water that will be required to achieve the goals of the customer.

As an example lets assume the following:

A new home is been renovated with a new bathroom and laundry, so easy access to install new pipework will be possible.

Pipework from the tank location will be installed to feed one toilet and also a top loader washing machine. A garden tap will also be installed to assist in watering the back garden.

A Look At Water Usage

Lets look at the toilet first, and estimate the amount of water that will be required for a week. A full flush of a standard toilet uses 4.5 litres of water, while a half flush uses 4 litres of water. An average person flushes the toilet 20 times per week.

Lets assume we have a family of 4 living in the home. A simple calculation could be  as follows
20 flushes x 4.5 litres = 90 litres x 4 people = 360 litres per week

So from this simple calculation we can estimate that we will need at least 360 litres of water per week to supply water to the main toilet for a family of four.

Now lets look at the washing machine. The laundry is to be fitted with a top loading machine, which does tend to use substantially more water than a front loading machine.
This top loader will require approximately 140 litres per full cycle. The family on average is doing 5 loads per week.

Our calculation is as follows:

5 loads x 140 litres = 700 litres per week

We can now see that will the rainwater tank been fitted to the main toilet, and the new top loading washing machine, we are going to require a minimum of 1,060 litres per week.

Now it can be difficult to estimate the amount of water that will be required for the back garden tap. Obviously if a quality irrigation system is been installed, less water will be required than if a hose is used to water the garden. For our example lets allow another 200 litres per week for watering the back garden

We now have a total of 1,260 litres per week that will be required to supply water to the home and the garden.

From the above information we are going to attempt to install a minimum capacity tank of 3000 litres.

What Space is Available For The Water Tank

The available space for the tank is now going to be the determining factor on what type of tank we purchase. As a general rule, slimline rainwater tanks, are the most suitable types of tanks for inner city properties. We have measured the maximum space we have for the tank along the side passage and it is 5m in length, 2m in height and we have 980mm available between the building and the boundary fence.

With only 980mm in width available to us we are going to be looking for a very slim tank, as we don’t really want to block off total access to the side passage. The more common 3000 litre poly water tanks are usually between 720-750mm in width/depth. While these wider tanks are quite inexpensive, we are only going to be left with around 200mm to get past the tank. Most people will not be able to pass, so installing one of these tanks will effectively block off the side passage.

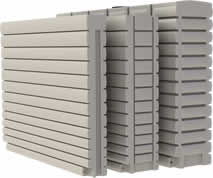
Once solution would be to utilise the entire length of 5m which we have available, and install two thinner slimline tanks. The new 2000 litre ThinTank would be the tank of choice in this instance. At 2400mm in length we could fit two end to end, which would take up 4.8m. The ThinTank is 1850mm in height, and this is less than the 2m in height we have available. The major benefit of the ver slimline ThinTank, apart from its aesthetically pleasing design, is how thin or slim it is at 480mm. This would give us half a metre in space left after the ThinTank is installed, allowing easy access past the tanks.

With the two 2000 litre ThinTanks been installed we would have a total capacity of 4000 litres. Our final calculation of 4000 litres tank capacity divided by 1,260 litres water required would give us approximatly 3.17 weeks of water from a full tank. For an inner city property this is quite acceptable.

One very important thing that I always tell my customers during Site Assessments, is that it is not all about the size of the tank, but more importantly it should be about how much roof area we are going to harvest to feed the tank. The larger the roof area harvested the quicker the tank will fill and replenish.

Every square metre of roof collects 1 litre of water for every 1 millimetre of rainfall received. Therefore, a tank connected to 50% of the roof area of a 200 m2 roof would collect 1000 litres after 10 millimetres of rain.

Calculations, formulas and charts are usefull but as a golden rule, the more of the roof that we be harvested and fed to the tank the better. This can be done by connecting downpipes directly to the tank inlet or by using charged lines.

Of course the example given above has been used to illustrate the water usage of particular fixtures and show how the space available can be used wisely to achieve the required outcome. Every home is different and this is why using our Site Assessment service is a great idea. There are a lot of different slimline and modular tanks available on the market today and our experience staff, if on site, will be able to give you all options.

Please feel free to add your own comments or questions below and I will respond in a timely manner.

[widget id=”execphp-3″]execphp-3[/widget]

Categories
FAQ

What is A First Flush Diverter?

This is a question from our FAQ Water Tanks Page where we needed to supply a much more detailed explanation.

A first flush filter is usually fitted to every down pipe that is to feed water to the rainwater tank. The diverter prevents the initial 10-25 litres of water collected from the roof, from entering the inlet of the rainwater tank.

The reason for this is that this water is usually dirty,  contaminated with leaves, debri and sometimes mosquito eggs from the gutter or roof that is been harvested.

A standard first flush filter consists of a PVC tee and a ball float and unscrewable cap. A PVC drop pipe is connected to the bottom part of the tee. This drop pipe should be made as long as is possible so as to collect as much water as possible. The bottom of the drop pipe has a cap on it which holds a ball float.

As the pipe is filled with the diverted water the ball floats up the pipe until it reaches the top of the tee and makes a seal. Once the bottom part of the tee is sealed with the ball, the water is then diverted to the tank.

How The Diverter Works

A small rubber orifice is made in the cap at the bottom of the drop pipe to slowly release the dirty water so the filter is ready for use the next time it rains. Every few weeks, depending on rainfall, the cap should be unscrewed and the small strainer inside cleaned out and replaced.

You can view a video on the function of the filter by clicking on the video below.

[dt_gap height=”10″ /][youtube=http://youtu.be/IjAsvj2dQxg&w=853&h=480&rel=0][dt_gap height=”10″ /]

If you have anymore questions about the first flush diverter please use our comment form below and we will respond in a timely manner.

Categories
FAQ

How To Maintain A Healthy Rainwater Storage Tank

Having a rainwater tank can be a very positive environmental initiative to take for your home.

Rainwater tanks are a great source of alternative water supply for your home and can be an invaluable asset during an emergency such as a bushfire or natural disaster.

Keeping your water storage tank healthy and free from sludge, mosquitoes etc is very important and to successfully do this a regular maintenance program should be adhered to.

Mosquito’s Can Cause Serious Problems

Healthy Rainwater Storage TankMosquitoes can cause some serious health problems such as Dengue Fever and also the Ross River Virus.
It is therefore very important to prevent mosquitoes from entering your tank environment. The first step in prevention is to ensure you purchase a rainwater tank with a mosquito proof inlet screen on the tank inlet.

This is a very well sealed and fine mesh which is fine enough to not allow the mosquitoes through.

Most tanks sold today in Australia do come fitted with a mosquito proof inlet screen. These inlet screens also prevent leaves and fine particles from the roof entering the tank, and therefore need to be cleaned on a regular basis, as the screen will tend to fill up over time.

Most inlet screens are removable, and once removed a quick flush with a good hose should ensure removal of all junk. Once cleaned always be sure to fit the screen tight and well sealed to the tank again ready for use.

Mosquitoes can also breed around the tank and under fittings which may have small leaks which leave puddles. It is always best to regularly check that no small water puddles are present under the overflow, outlet pipes of your tank.

If a small puddle is present, further inspection will most probably show a leak somewhere on the adjacent fittings or pipework. These must be rectified immediately to prevent mosquitoes breeding.

If you do find mosquito larvae or wrigglers in your tank, then mosquitoes have found a way in. One other possible way of entry to the rainwater tank may be through debris & leaves building up in your gutters, which in turn assists in creating small puddles of water where the mosquitoes can breed. The eggs from the mosquitoes can then be washed from the gutter down the down pipe into the tank.

This is why as part of your tank maintenance program you must always check and clear your gutters from debris. This will also assist in keeping sludge from building up in the bottom of the water tank.

A good quality gutter guard can be very effective in keeping your gutters clean, although this does not remove the need of regular maintenance.

Why You Should Install A First Flush Filter

Another must for ensuring a mosquito and sludge free water tank is fitting a First Flush Filter to all downpipes. The first flush filter is designed to take the first 4-8 litres of dirty  water from the roof and divert it to a separate pipe which has a orifice at the bottom of it so as it is self clearing, ready for new rainfall. There is a removable cap at the bottom of this pipe which is required to be opened and cleared on a regular basis.

Making the above steps part of a regular maintenance program should ensure mosquito and sludge free water in your storage tank.

Categories
FAQ

Should I Choose a Steel or Poly Rainwater Tank?

A question I am often asked when taking calls in our sales department is this, “Should I buy a steel or poly rainwater tank, what is the difference? “

There are several points which I usually make to the customer in assisting them in making their choice.

Let’s look at a few of them below:

The Size Of The Water Tank

The first consideration is to know the amount of space that you have available when opting for either a steel or poly rainwater tank. The manufacturing process of each type of tank is considerably different.

thintanks range of water tanksPolyethylene tanks are made using a process called Roto Moulding. This involves a mould of the desired tank size to be filled with poly powder and then placed into a large oven where it is rotated until the powder distributes within the mould and forms the plastic shell.

These water tank moulds are usually made from a metal such as Aluminum and can be very expensive depending on the tank design i.e. – round or slimline design.

The moulds for some of the more basic slimline designs can range in price from $30,000 to $60,000 dollars each. Some of the more complicated moulds such as the moulds used to make the ThinTanks range of rainwater tanks cost between $120,000 to $220,000 each.

So we can see that each individual sized poly rainwater tank requires a different mould. The size of the tank cannot be changed as the mould is a set size, and to change the size of an existing poly tank a new mould would be required. This is why most Poly Rainwater Tank Manufacturers have a set range of tanks.

When a customer calls me with an enquiry regarding the type of tank, my first question is always the same, “What are the dimensions of the space you have available for the tank? i.e. – The maximum length, the maximum width or depth of the tank and the maximum height the tank can be.

The answer to this initial question will tell me if the customer has a choice for a poly or steel tank, or both. This is due to the fact the poly range of tanks is restricted to the size of the moulds the manufacturer has in their line.

steel rainwater tanks

The major benefit of the steel slimline, round tanks is that they are custom made using a rolling machine. They do not require the Roto Moulding process or expensive moulds like the polyethylene tanks.

They still have some restrictions to the maximum length or height of certain tank designs, but essentially the steel custom made tank is made for the space the customer has available.

Also another factor is that due to the design of the steel tanks, especially the slimline and modline rainwater tanks, the capacity is generally greater for the space they take up, compared to their poly counterparts.

The Location of the Tank

Another factor in the decision between the two types of tanks is the location of the tank.

Is the Rainwater Tank to be located in an area that is going to be seen, such as the backyard, adjacent to a deck?

Or is it to be located down the back on the garden shed or possibly along the side of the house that is not ever really seen.

The aesthetics obviously become more of a major factor if the tank is going to  be located in a place where it will be visible.

Personal preference obviously does come into play here but the vast majority of people do prefer the custom made steel tanks compared to the more standard design poly tanks, when the tank will be on display.

The exception to this rule is the new ThinTank™ range of rainwater tanks with their sleek and compact design. Many architects and builders are finding that their customers prefer this new rectangular design Poly Tank to the steel tanks.

Of course, as mentioned before, personal preference for a design comes into play here.

The Cost of the Tank

Obviously the cost of the tanks is an important factor in any choice.

Generally, the Polyethylene designed rainwater storage tanks are less expensive than their Steel counterparts.

Depending on the size and design of the tank, i.e. – round or slimline, the cost can be considerable.

The difference between a Round poly tank and a Round Steel tank is less than the difference between the slimline designs. The steel slimline tanks are quite a bit more expensive than the standard poly slimline tanks.

The higher end Poly ThinTank™ is in the middle of the less expensive standard poly tanks and the custom made steel slimline tanks.

I trust this information has been helpful to you and will assist you in making your decision.

Of course please feel free to call us on 1300 885 547 or leave your comments below, and as mentioned at the start of this article, ensure you first establish the space you have available for the rainwater tank.